Deploying the Salesforce Application
Application XML Upload
Defining Salesforce as a Target application is the first item to be configured to start utilizing Identity Bridge capabilities.
Follow below steps to upload Application XML which defines the target system in Identity Bridge
- Login to Identity Bridge: Access the Identity Bridge management interface using your credentials.
- Go to System Management: Navigate to the System Management section within the Identity Bridge interface.
- Go to Configure Source: Within the System Management section, select the Configure Source option.
- Go to Un-Deployed Sources tab: Look for the Un-Deployed Sources tab and click on it. This tab typically displays applications that have not yet been deployed.
- Click on “Add New System”: Locate the “Add New System” button and click on it to initiate the process of adding a new source application.
- Click on “Upload System File”: A pop-up window will appear. Choose the XML file corresponding to the source application and click on the “Upload” button to upload the application file.

Redirect to Configure Source: After the application file is uploaded, you should be redirected back to the main screen of the Configure Source section.
Go to Un-Deployed Sources tab: Return to the Un-Deployed Sources tab. You should now see the newly uploaded application listed here.
Repeat steps for other applications: If you have additional source applications to onboard, repeat steps 5 to 8 for each application.
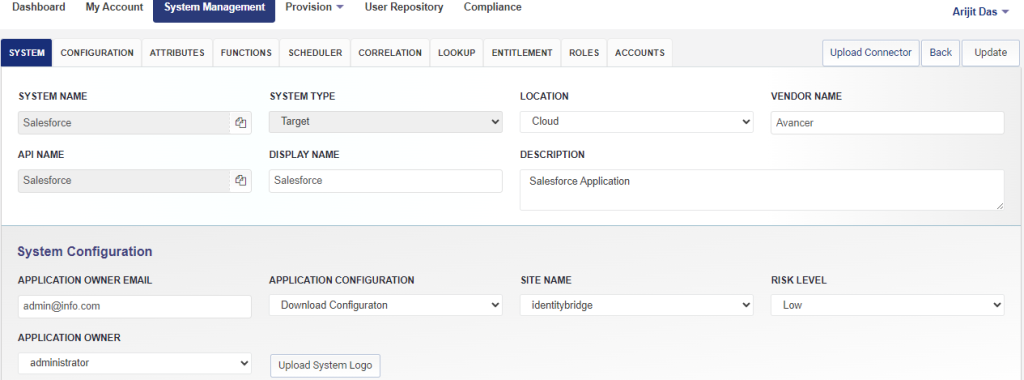
Edit application details: Click on the “edit” option for a specific application tile. This will open a new window where you can enter the connection details and update other relevant information as required.
Update and upload connector: Save the details by clicking on the “Update” button. Then, click on “Upload Connector” to upload the connector XML file associated with the application.
Verify connector upload: Refresh the page and navigate to the configuration section. The connector details should now be visible to confirm a successful upload.
Test connection: Once the Connector and Connection details are saved, you can perform a “Test Connection” to ensure the connection between Identity Bridge and the source application is established properly.
Repeat for other applications: Repeat steps 10 to 13 for each source application you have onboarded.
Deploy the application: Once all the applications have been successfully updated, go back to the Un-Deployed Sources tab and click on the “Deploy” option for each application to activate them.
Perform operations on the application: After the application is deployed, you will be able to perform various operations and configurations specific to each application within the Identity Bridge environment.